|
|
As a completely decentralised tool, Mercurial doesn’t impose any policy on how people ought to work with each other. However, if you’re new to distributed revision control, it helps to have some tools and examples in mind when you’re thinking about possible workflow models.
Mercurial has a powerful web interface that provides several useful capabilities.
For interactive use, the web interface lets you browse a single repository or a collection of repositories. You can view the history of a repository, examine each change (comments and diffs), and view the contents of each directory and file.
Also for human consumption, the web interface provides an RSS feed of the changes in a repository. This lets you “subscribe” to a repository using your favourite feed reader, and be automatically notified of activity in that repository as soon as it happens. I find this capability much more convenient than the model of subscribing to a mailing list to which notifications are sent, as it requires no additional configuration on the part of whoever is serving the repository.
The web interface also lets remote users clone a repository, pull changes from it, and (when the server is configured to permit it) push changes back to it. Mercurial’s HTTP tunneling protocol aggressively compresses data, so that it works efficiently even over low-bandwidth network connections.
The easiest way to get started with the web interface is to use your web browser to visit an existing repository, such as the master Mercurial repository at http://www.selenic.com/repo/hg?style=gitweb.
If you’re interested in providing a web interface to your own repositories, Mercurial provides two ways to do this. The first is using the “hg serve” command, which is best suited to short-term “lightweight” serving. See section 6.4 below for details of how to use this command. If you have a long-lived repository that you’d like to make permanently available, Mercurial has built-in support for the CGI (Common Gateway Interface) standard, which all common web servers support. See section 6.6 for details of CGI configuration.
With a suitably flexible tool, making decisions about workflow is much more of a social engineering challenge than a technical one. Mercurial imposes few limitations on how you can structure the flow of work in a project, so it’s up to you and your group to set up and live with a model that matches your own particular needs.
The most important aspect of any model that you must keep in mind is how well it matches the needs and capabilities of the people who will be using it. This might seem self-evident; even so, you still can’t afford to forget it for a moment.
I once put together a workflow model that seemed to make perfect sense to me, but that caused a considerable amount of consternation and strife within my development team. In spite of my attempts to explain why we needed a complex set of branches, and how changes ought to flow between them, a few team members revolted. Even though they were smart people, they didn’t want to pay attention to the constraints we were operating under, or face the consequences of those constraints in the details of the model that I was advocating.
Don’t sweep foreseeable social or technical problems under the rug. Whatever scheme you put into effect, you should plan for mistakes and problem scenarios. Consider adding automated machinery to prevent, or quickly recover from, trouble that you can anticipate. As an example, if you intend to have a branch with not-for-release changes in it, you’d do well to think early about the possibility that someone might accidentally merge those changes into a release branch. You could avoid this particular problem by writing a hook that prevents changes from being merged from an inappropriate branch.
I wouldn’t suggest an “anything goes” approach as something sustainable, but it’s a model that’s easy to grasp, and it works perfectly well in a few unusual situations.
As one example, many projects have a loose-knit group of collaborators who rarely physically meet each other. Some groups like to overcome the isolation of working at a distance by organising occasional “sprints”. In a sprint, a number of people get together in a single location (a company’s conference room, a hotel meeting room, that kind of place) and spend several days more or less locked in there, hacking intensely on a handful of projects.
A sprint is the perfect place to use the “hg serve” command, since “hg serve” does not requires any fancy server infrastructure. You can get started with “hg serve” in moments, by reading section 6.4 below. Then simply tell the person next to you that you’re running a server, send the URL to them in an instant message, and you immediately have a quick-turnaround way to work together. They can type your URL into their web browser and quickly review your changes; or they can pull a bugfix from you and verify it; or they can clone a branch containing a new feature and try it out.
The charm, and the problem, with doing things in an ad hoc fashion like this is that only people who know about your changes, and where they are, can see them. Such an informal approach simply doesn’t scale beyond a handful people, because each individual needs to know about n different repositories to pull from.
For smaller projects migrating from a centralised revision control tool, perhaps the easiest way to get started is to have changes flow through a single shared central repository. This is also the most common “building block” for more ambitious workflow schemes.
Contributors start by cloning a copy of this repository. They can pull changes from it whenever they need to, and some (perhaps all) developers have permission to push a change back when they’re ready for other people to see it.
Under this model, it can still often make sense for people to pull changes directly from each other, without going through the central repository. Consider a case in which I have a tentative bug fix, but I am worried that if I were to publish it to the central repository, it might subsequently break everyone else’s trees as they pull it. To reduce the potential for damage, I can ask you to clone my repository into a temporary repository of your own and test it. This lets us put off publishing the potentially unsafe change until it has had a little testing.
In this kind of scenario, people usually use the ssh protocol to securely push changes to the central repository, as documented in section 6.5. It’s also usual to publish a read-only copy of the repository over HTTP using CGI, as in section 6.6. Publishing over HTTP satisfies the needs of people who don’t have push access, and those who want to use web browsers to browse the repository’s history.
Projects of any significant size naturally tend to make progress on several fronts simultaneously. In the case of software, it’s common for a project to go through periodic official releases. A release might then go into “maintenance mode” for a while after its first publication; maintenance releases tend to contain only bug fixes, not new features. In parallel with these maintenance releases, one or more future releases may be under development. People normally use the word “branch” to refer to one of these many slightly different directions in which development is proceeding.
Mercurial is particularly well suited to managing a number of simultaneous, but not identical, branches. Each “development direction” can live in its own central repository, and you can merge changes from one to another as the need arises. Because repositories are independent of each other, unstable changes in a development branch will never affect a stable branch unless someone explicitly merges those changes in.
Here’s an example of how this can work in practice. Let’s say you have one “main branch” on a central server.
People clone it, make changes locally, test them, and push them back.
Once the main branch reaches a release milestone, you can use the “hg tag” command to give a permanent name to the milestone revision.
Let’s say some ongoing development occurs on the main branch.
Using the tag that was recorded at the milestone, people who clone that repository at any time in the future can use “hg update” to get a copy of the working directory exactly as it was when that tagged revision was committed.
In addition, immediately after the main branch is tagged, someone can then clone the main branch on the server to a new “stable” branch, also on the server.
Someone who needs to make a change to the stable branch can then clone that repository, make their changes, commit, and push their changes back there.
Because Mercurial repositories are independent, and Mercurial doesn’t move changes around automatically, the stable and main branches are isolated from each other. The changes that you made on the main branch don’t “leak” to the stable branch, and vice versa.
You’ll often want all of your bugfixes on the stable branch to show up on the main branch, too. Rather than rewrite a bugfix on the main branch, you can simply pull and merge changes from the stable to the main branch, and Mercurial will bring those bugfixes in for you.
The main branch will still contain changes that are not on the stable branch, but it will also contain all of the bugfixes from the stable branch. The stable branch remains unaffected by these changes.
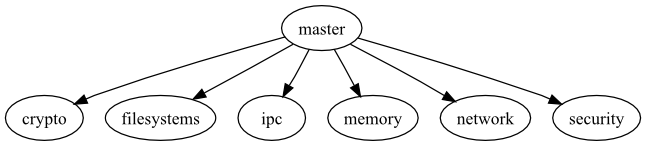
For larger projects, an effective way to manage change is to break up a team into smaller groups. Each group has a shared branch of its own, cloned from a single “master” branch used by the entire project. People working on an individual branch are typically quite isolated from developments on other branches.
When a particular feature is deemed to be in suitable shape, someone on that feature team pulls and merges from the master branch into the feature branch, then pushes back up to the master branch.
Some projects are organised on a “train” basis: a release is scheduled to happen every few months, and whatever features are ready when the “train” is ready to leave are allowed in.
This model resembles working with feature branches. The difference is that when a feature branch misses a train, someone on the feature team pulls and merges the changes that went out on that train release into the feature branch, and the team continues its work on top of that release so that their feature can make the next release.
The development of the Linux kernel has a shallow hierarchical structure, surrounded by a cloud of apparent chaos. Because most Linux developers use git, a distributed revision control tool with capabilities similar to Mercurial, it’s useful to describe the way work flows in that environment; if you like the ideas, the approach translates well across tools.
At the center of the community sits Linus Torvalds, the creator of Linux. He publishes a single source repository that is considered the “authoritative” current tree by the entire developer community. Anyone can clone Linus’s tree, but he is very choosy about whose trees he pulls from.
Linus has a number of “trusted lieutenants”. As a general rule, he pulls whatever changes they publish, in most cases without even reviewing those changes. Some of those lieutenants are generally agreed to be “maintainers”, responsible for specific subsystems within the kernel. If a random kernel hacker wants to make a change to a subsystem that they want to end up in Linus’s tree, they must find out who the subsystem’s maintainer is, and ask that maintainer to take their change. If the maintainer reviews their changes and agrees to take them, they’ll pass them along to Linus in due course.
Individual lieutenants have their own approaches to reviewing, accepting, and publishing changes; and for deciding when to feed them to Linus. In addition, there are several well known branches that people use for different purposes. For example, a few people maintain “stable” repositories of older versions of the kernel, to which they apply critical fixes as needed. Some maintainers publish multiple trees: one for experimental changes; one for changes that they are about to feed upstream; and so on. Others just publish a single tree.
This model has two notable features. The first is that it’s “pull only”. You have to ask, convince, or beg another developer to take a change from you, because there are almost no trees to which more than one person can push, and there’s no way to push changes into a tree that someone else controls.
The second is that it’s based on reputation and acclaim. If you’re an unknown, Linus will probably ignore changes from you without even responding. But a subsystem maintainer will probably review them, and will likely take them if they pass their criteria for suitability. The more “good” changes you contribute to a maintainer, the more likely they are to trust your judgment and accept your changes. If you’re well-known and maintain a long-lived branch for something Linus hasn’t yet accepted, people with similar interests may pull your changes regularly to keep up with your work.
Reputation and acclaim don’t necessarily cross subsystem or “people” boundaries. If you’re a respected but specialised storage hacker, and you try to fix a networking bug, that change will receive a level of scrutiny from a network maintainer comparable to a change from a complete stranger.
To people who come from more orderly project backgrounds, the comparatively chaotic Linux kernel development process often seems completely insane. It’s subject to the whims of individuals; people make sweeping changes whenever they deem it appropriate; and the pace of development is astounding. And yet Linux is a highly successful, well-regarded piece of software.
A perpetual source of heat in the open source community is whether a development model in which people only ever pull changes from others is “better than” one in which multiple people can push changes to a shared repository.
Typically, the backers of the shared-push model use tools that actively enforce this approach. If you’re using a centralised revision control tool such as Subversion, there’s no way to make a choice over which model you’ll use: the tool gives you shared-push, and if you want to do anything else, you’ll have to roll your own approach on top (such as applying a patch by hand).
A good distributed revision control tool, such as Mercurial, will support both models. You and your collaborators can then structure how you work together based on your own needs and preferences, not on what contortions your tools force you into.
Once you and your team set up some shared repositories and start propagating changes back and forth between local and shared repos, you begin to face a related, but slightly different challenge: that of managing the multiple directions in which your team may be moving at once. Even though this subject is intimately related to how your team collaborates, it’s dense enough to merit treatment of its own, in chapter 8.
The remainder of this chapter is devoted to the question of serving data to your collaborators.
Mercurial’s “hg serve” command is wonderfully suited to small, tight-knit, and fast-paced group environments. It also provides a great way to get a feel for using Mercurial commands over a network.
Run “hg serve” inside a repository, and in under a second it will bring up a specialised HTTP server; this will accept connections from any client, and serve up data for that repository until you terminate it. Anyone who knows the URL of the server you just started, and can talk to your computer over the network, can then use a web browser or Mercurial to read data from that repository. A URL for a “hg serve” instance running on a laptop is likely to look something like http://my-laptop.local:8000/.
The “hg serve” command is not a general-purpose web server. It can do only two things:
In particular, “hg serve” won’t allow remote users to modify your repository. It’s intended for read-only use.
If you’re getting started with Mercurial, there’s nothing to prevent you from using “hg serve” to serve up a repository on your own computer, then use commands like “hg clone”, “hg incoming”, and so on to talk to that server as if the repository was hosted remotely. This can help you to quickly get acquainted with using commands on network-hosted repositories.
Because it provides unauthenticated read access to all clients, you should only use “hg serve” in an environment where you either don’t care, or have complete control over, who can access your network and pull data from your repository.
The “hg serve” command knows nothing about any firewall software you might have installed on your system or network. It cannot detect or control your firewall software. If other people are unable to talk to a running “hg serve” instance, the second thing you should do (after you make sure that they’re using the correct URL) is check your firewall configuration.
By default, “hg serve” listens for incoming connections on port 8000. If another process is already listening on the port you want to use, you can specify a different port to listen on using the -p option.
Normally, when “hg serve” starts, it prints no output, which can be a bit unnerving. If you’d like to confirm that it is indeed running correctly, and find out what URL you should send to your collaborators, start it with the -v option.
You can pull and push changes securely over a network connection using the Secure Shell (ssh) protocol. To use this successfully, you may have to do a little bit of configuration on the client or server sides.
If you’re not familiar with ssh, it’s a network protocol that lets you securely communicate with another computer. To use it with Mercurial, you’ll be setting up one or more user accounts on a server so that remote users can log in and execute commands.
(If you are familiar with ssh, you’ll probably find some of the material that follows to be elementary in nature.)
An ssh URL tends to look like this:
There’s plenty of scope for confusion with the path component of ssh URLs, as there is no standard way for tools to interpret it. Some programs behave differently than others when dealing with these paths. This isn’t an ideal situation, but it’s unlikely to change. Please read the following paragraphs carefully.
Mercurial treats the path to a repository on the server as relative to the remote user’s home directory. For example, if user foo on the server has a home directory of /home/foo, then an ssh URL that contains a path component of bar really refers to the directory /home/foo/bar.
If you want to specify a path relative to another user’s home directory, you can use a path that starts with a tilde character followed by the user’s name (let’s call them otheruser), like this.
And if you really want to specify an absolute path on the server, begin the path component with two slashes, as in this example.
Almost every Unix-like system comes with OpenSSH preinstalled. If you’re using such a system, run which ssh to find out if the ssh command is installed (it’s usually in /usr/bin). In the unlikely event that it isn’t present, take a look at your system documentation to figure out how to install it.
On Windows, you’ll first need to choose download a suitable ssh client. There are two alternatives.
In either case, you’ll need to edit your Mercurial.ini file to tell Mercurial where to find the actual client command. For example, if you’re using PuTTY, you’ll need to use the plink command as a command-line ssh client.
| Note: The path to plink shouldn’t contain any whitespace characters, or Mercurial
may not be able to run it correctly (so putting it in C: Program Files is probably not a good idea). |
To avoid the need to repetitively type a password every time you need to use your ssh client, I recommend generating a key pair. On a Unix-like system, the ssh-keygen command will do the trick. On Windows, if you’re using PuTTY, the puttygen command is what you’ll need.
When you generate a key pair, it’s usually highly advisable to protect it with a passphrase. (The only time that you might not want to do this id when you’re using the ssh protocol for automated tasks on a secure network.)
Simply generating a key pair isn’t enough, however. You’ll need to add the public key to the set of authorised keys for whatever user you’re logging in remotely as. For servers using OpenSSH (the vast majority), this will mean adding the public key to a list in a file called authorizedt4ht@95xkeys in their .ssh directory.
On a Unix-like system, your public key will have a .pub extension. If you’re using puttygen on Windows, you can save the public key to a file of your choosing, or paste it from the window it’s displayed in straight into the authorizedt4ht@95xkeys file.
An authentication agent is a daemon that stores passphrases in memory (so it will forget passphrases if you log out and log back in again). An ssh client will notice if it’s running, and query it for a passphrase. If there’s no authentication agent running, or the agent doesn’t store the necessary passphrase, you’ll have to type your passphrase every time Mercurial tries to communicate with a server on your behalf (e.g. whenever you pull or push changes).
The downside of storing passphrases in an agent is that it’s possible for a well-prepared attacker to recover the plain text of your passphrases, in some cases even if your system has been power-cycled. You should make your own judgment as to whether this is an acceptable risk. It certainly saves a lot of repeated typing.
On Unix-like systems, the agent is called ssh-agent, and it’s often run automatically for you when you log in. You’ll need to use the ssh-add command to add passphrases to the agent’s store. On Windows, if you’re using PuTTY, the pageant command acts as the agent. It adds an icon to your system tray that will let you manage stored passphrases.
Because ssh can be fiddly to set up if you’re new to it, there’s a variety of things that can go wrong. Add Mercurial on top, and there’s plenty more scope for head-scratching. Most of these potential problems occur on the server side, not the client side. The good news is that once you’ve gotten a configuration working, it will usually continue to work indefinitely.
Before you try using Mercurial to talk to an ssh server, it’s best to make sure that you can use the normal ssh or putty command to talk to the server first. If you run into problems with using these commands directly, Mercurial surely won’t work. Worse, it will obscure the underlying problem. Any time you want to debug ssh-related Mercurial problems, you should drop back to making sure that plain ssh client commands work first, before you worry about whether there’s a problem with Mercurial.
The first thing to be sure of on the server side is that you can actually log in from another machine at all. If you can’t use ssh or putty to log in, the error message you get may give you a few hints as to what’s wrong. The most common problems are as follows.
In summary, if you’re having trouble talking to the server’s ssh daemon, first make sure that one is running at all. On many systems it will be installed, but disabled, by default. Once you’re done with this step, you should then check that the server’s firewall is configured to allow incoming connections on the port the ssh daemon is listening on (usually 22). Don’t worry about more exotic possibilities for misconfiguration until you’ve checked these two first.
If you’re using an authentication agent on the client side to store passphrases for your keys, you ought to be able to log into the server without being prompted for a passphrase or a password. If you’re prompted for a passphrase, there are a few possible culprits.
If you’re being prompted for the remote user’s password, there are another few possible problems to check.
In the ideal world, you should be able to run the following command successfully, and it should print exactly one line of output, the current date and time.
If, on your server, you have login scripts that print banners or other junk even when running non-interactive commands like this, you should fix them before you continue, so that they only print output if they’re run interactively. Otherwise these banners will at least clutter up Mercurial’s output. Worse, they could potentially cause problems with running Mercurial commands remotely. Mercurial makes tries to detect and ignore banners in non-interactive ssh sessions, but it is not foolproof. (If you’re editing your login scripts on your server, the usual way to see if a login script is running in an interactive shell is to check the return code from the command tty -s.)
Once you’ve verified that plain old ssh is working with your server, the next step is to ensure that Mercurial runs on the server. The following command should run successfully:
If you see an error message instead of normal “hg version” output, this is usually because you haven’t installed Mercurial to /usr/bin. Don’t worry if this is the case; you don’t need to do that. But you should check for a few possible problems.
If you can run “hg version” over an ssh connection, well done! You’ve got the server and client sorted out. You should now be able to use Mercurial to access repositories hosted by that username on that server. If you run into problems with Mercurial and ssh at this point, try using the --debug option to get a clearer picture of what’s going on.
Mercurial does not compress data when it uses the ssh protocol, because the ssh protocol can transparently compress data. However, the default behaviour of ssh clients is not to request compression.
Over any network other than a fast LAN (even a wireless network), using compression is likely to significantly speed up Mercurial’s network operations. For example, over a WAN, someone measured compression as reducing the amount of time required to clone a particularly large repository from 51 minutes to 17 minutes.
Both ssh and plink accept a -C option which turns on compression. You can easily edit your hgrc to enable compression for all of Mercurial’s uses of the ssh protocol.
If you use ssh, you can configure it to always use compression when talking to your server. To do this, edit your .ssh/config file (which may not yet exist), as follows.
This defines an alias, hg. When you use it on the ssh command line or in a Mercurial ssh-protocol URL, it will cause ssh to connect to hg.example.com and use compression. This gives you both a shorter name to type and compression, each of which is a good thing in its own right.
Depending on how ambitious you are, configuring Mercurial’s CGI interface can take anything from a few moments to several hours.
We’ll begin with the simplest of examples, and work our way towards a more complex configuration. Even for the most basic case, you’re almost certainly going to need to read and modify your web server’s configuration.
| Note: Configuring a web server is a complex, fiddly, and highly system-dependent activity. I can’t possibly give you instructions that will cover anything like all of the cases you will encounter. Please use your discretion and judgment in following the sections below. Be prepared to make plenty of mistakes, and to spend a lot of time reading your server’s error logs. |
Before you continue, do take a few moments to check a few aspects of your system’s setup.
If you don’t have a web server installed, and don’t have substantial experience configuring Apache, you should consider using the lighttpd web server instead of Apache. Apache has a well-deserved reputation for baroque and confusing configuration. While lighttpd is less capable in some ways than Apache, most of these capabilities are not relevant to serving Mercurial repositories. And lighttpd is undeniably much easier to get started with than Apache.
On Unix-like systems, it’s common for users to have a subdirectory named something like publict4ht@95xhtml in their home directory, from which they can serve up web pages. A file named foo in this directory will be accessible at a URL of the form http://www.example.com/ũsername/foo.
To get started, find the hgweb.cgi script that should be present in your Mercurial installation. If you can’t quickly find a local copy on your system, simply download one from the master Mercurial repository at http://www.selenic.com/repo/hg/raw-file/tip/hgweb.cgi.
You’ll need to copy this script into your publict4ht@95xhtml directory, and ensure that it’s executable.
The 755 argument to chmod is a little more general than just making the script executable: it ensures that the script is executable by anyone, and that “group” and “other” write permissions are not set. If you were to leave those write permissions enabled, Apache’s suexec subsystem would likely refuse to execute the script. In fact, suexec also insists that the directory in which the script resides must not be writable by others.
Once you’ve copied the CGI script into place, go into a web browser, and try to open the URL http://myhostname/∼myuser/hgweb.cgi, but brace yourself for instant failure. There’s a high probability that trying to visit this URL will fail, and there are many possible reasons for this. In fact, you’re likely to stumble over almost every one of the possible errors below, so please read carefully. The following are all of the problems I ran into on a system running Fedora 7, with a fresh installation of Apache, and a user account that I created specially to perform this exercise.
Your web server may have per-user directories disabled. If you’re using Apache, search your config file for a UserDir directive. If there’s none present, per-user directories will be disabled. If one exists, but its value is disabled, then per-user directories will be disabled. Otherwise, the string after UserDir gives the name of the subdirectory that Apache will look in under your home directory, for example publict4ht@95xhtml.
Your file access permissions may be too restrictive. The web server must be able to traverse your home directory and directories under your publict4ht@95xhtml directory, and read files under the latter too. Here’s a quick recipe to help you to make your permissions more appropriate.
The other possibility with permissions is that you might get a completely empty window when you try to load the script. In this case, it’s likely that your access permissions are too permissive. Apache’s suexec subsystem won’t execute a script that’s group- or world-writable, for example.
Your web server may be configured to disallow execution of CGI programs in your per-user web directory. Here’s Apache’s default per-user configuration from my Fedora system.
If you find a similar-looking Directory group in your Apache configuration, the directive to look at inside it is Options. Add ExecCGI to the end of this list if it’s missing, and restart the web server.
If you find that Apache serves you the text of the CGI script instead of executing it, you may need to either uncomment (if already present) or add a directive like this.
The next possibility is that you might be served with a colourful Python backtrace claiming that it can’t import a mercurial-related module. This is actually progress! The server is now capable of executing your CGI script. This error is only likely to occur if you’re running a private installation of Mercurial, instead of a system-wide version. Remember that the web server runs the CGI program without any of the environment variables that you take for granted in an interactive session. If this error happens to you, edit your copy of hgweb.cgi and follow the directions inside it to correctly set your PYTHONPATH environment variable.
Finally, you are certain to by served with another colourful Python backtrace: this one will complain that it can’t find /path/to/repository. Edit your hgweb.cgi script and replace the /path/to/repository string with the complete path to the repository you want to serve up.
At this point, when you try to reload the page, you should be presented with a nice HTML view of your repository’s history. Whew!
To be exhaustive in my experiments, I tried configuring the increasingly popular lighttpd web server to serve the same repository as I described with Apache above. I had already overcome all of the problems I outlined with Apache, many of which are not server-specific. As a result, I was fairly sure that my file and directory permissions were good, and that my hgweb.cgi script was properly edited.
Once I had Apache running, getting lighttpd to serve the repository was a snap (in other words, even if you’re trying to use lighttpd, you should read the Apache section). I first had to edit the modt4ht@95xaccess section of its config file to enable modt4ht@95xcgi and modt4ht@95xuserdir, both of which were disabled by default on my system. I then added a few lines to the end of the config file, to configure these modules.
With this done, lighttpd ran immediately for me. If I had configured lighttpd before Apache, I’d almost certainly have run into many of the same system-level configuration problems as I did with Apache. However, I found lighttpd to be noticeably easier to configure than Apache, even though I’ve used Apache for over a decade, and this was my first exposure to lighttpd.
The hgweb.cgi script only lets you publish a single repository, which is an annoying restriction. If you want to publish more than one without wracking yourself with multiple copies of the same script, each with different names, a better choice is to use the hgwebdir.cgi script.
The procedure to configure hgwebdir.cgi is only a little more involved than for hgweb.cgi. First, you must obtain a copy of the script. If you don’t have one handy, you can download a copy from the master Mercurial repository at http://www.selenic.com/repo/hg/raw-file/tip/hgwebdir.cgi.
You’ll need to copy this script into your publict4ht@95xhtml directory, and ensure that it’s executable.
With basic configuration out of the way, try to visit http://myhostname/∼myuser/hgwebdir.cgi in your browser. It should display an empty list of repositories. If you get a blank window or error message, try walking through the list of potential problems in section 6.6.2.
The hgwebdir.cgi script relies on an external configuration file. By default, it searches for a file named hgweb.config in the same directory as itself. You’ll need to create this file, and make it world-readable. The format of the file is similar to a Windows “ini” file, as understood by Python’s ConfigParser [Pyt] module.
The easiest way to configure hgwebdir.cgi is with a section named collections. This will automatically publish every repository under the directories you name. The section should look like this:
Mercurial interprets this by looking at the directory name on the right hand side of the “=” sign; finding repositories in that directory hierarchy; and using the text on the left to strip off matching text from the names it will actually list in the web interface. The remaining component of a path after this stripping has occurred is called a “virtual path”.
Given the example above, if we have a repository whose local path is /my/root/this/repo, the CGI script will strip the leading /my/root from the name, and publish the repository with a virtual path of this/repo. If the base URL for our CGI script is http://myhostname/∼myuser/hgwebdir.cgi, the complete URL for that repository will be http://myhostname/∼myuser/hgwebdir.cgi/this/repo.
If we replace /my/root on the left hand side of this example with /my, then hgwebdir.cgi will only strip off /my from the repository name, and will give us a virtual path of root/this/repo instead of this/repo.
The hgwebdir.cgi script will recursively search each directory listed in the collections section of its configuration file, but it will not recurse into the repositories it finds.
The collections mechanism makes it easy to publish many repositories in a “fire and forget” manner. You only need to set up the CGI script and configuration file one time. Afterwards, you can publish or unpublish a repository at any time by simply moving it into, or out of, the directory hierarchy in which you’ve configured hgwebdir.cgi to look.
In addition to the collections mechanism, the hgwebdir.cgi script allows you to publish a specific list of repositories. To do so, create a paths section, with contents of the following form.
In this case, the virtual path (the component that will appear in a URL) is on the left hand side of each definition, while the path to the repository is on the right. Notice that there does not need to be any relationship between the virtual path you choose and the location of a repository in your filesystem.
If you wish, you can use both the collections and paths mechanisms simultaneously in a single configuration file.
| Note: If multiple repositories have the same virtual path, hgwebdir.cgi will not report an error. Instead, it will behave unpredictably. |
Mercurial’s web interface lets users download an archive of any revision. This archive will contain a snapshot of the working directory as of that revision, but it will not contain a copy of the repository data.
By default, this feature is not enabled. To enable it, you’ll need to add an allowt4ht@95xarchive item to the [web] section of your hgrc.
Mercurial’s web interfaces (the “hg serve” command, and the hgweb.cgi and hgwebdir.cgi scripts) have a number of configuration options that you can set. These belong in a section named [web].
If you provide an empty list, or don’t have an allowt4ht@95xarchive entry at all, this feature will be disabled. Here is an example of how to enable all three supported formats.
If you are using hgwebdir.cgi, you can place a few configuration items in a [web] section of the hgweb.config file instead of a hgrc file, for convenience. These items are motd and style.
A few [web] configuration items ought to be placed in a repository’s local .hg/hgrc, rather than a user’s or global hgrc.
Some of the items in the [web] section of a hgrc file are only for use with the “hg serve” command.
It is important to remember that a web server like Apache or lighttpd will run under a user ID that is different to yours. CGI scripts run by your server, such as hgweb.cgi, will usually also run under that user ID.
If you add [web] items to your own personal hgrc file, CGI scripts won’t read that hgrc file. Those settings will thus only affect the behaviour of the “hg serve” command when you run it. To cause CGI scripts to see your settings, either create a hgrc file in the home directory of the user ID that runs your web server, or add those settings to a system-wide hgrc file.